

Is It Hard to Replace an Electric Oven? A DIY Guide for Homeowners
 Jul, 19 2026
Electric Oven Installation Cost Calculator
Project Details
Estimated Costs
DIY Total
Pro Total
By doing it yourself
Quick Takeaways
- Replacing a standard slide-in or freestanding electric oven is a manageable weekend project if you have basic hand tools and comfort with household electrical work.
- Built-in ovens require more effort because they are mounted inside cabinetry, often needing new brackets and precise leveling.
- The hardest part isn't moving the oven; it's ensuring the power supply matches the new unit's voltage (usually 240V) and amperage requirements.
- You can save $150-$300 on professional installation fees by doing it yourself, provided your local code allows homeowner electrical work.
- Safety first: Always turn off the breaker before touching any wires. If the existing outlet doesn't match the new oven's plug, call an electrician.
You’re staring at that broken electric oven, waiting for parts that might never come, or maybe you just want a smarter model with better convection fans. The question on everyone’s mind is simple: Is it hard to replace an electric oven? The short answer is no, not really. But there’s a catch. It depends entirely on what kind of oven you have and how your kitchen was wired when it was built.
If you have a standard freestanding range-the kind that slides into a gap between cabinets-you’re in luck. These are designed to be moved. They have handles, wheels, and standardized connections. Swap one out, and you’ve essentially done a major home upgrade without hiring a crew. But if you have a wall oven tucked into your cabinets, the job changes from a heavy lift to a precision install. Let’s break down exactly what you need to know so you don’t end up with a dark kitchen and a tripped breaker.
Know Your Oven Type Before You Start
Not all ovens are created equal, and confusing them will make your life miserable. First, identify what you currently own. This determines the difficulty level.
Freestanding Ranges are the most common. They sit on the floor and connect to the wall via a cord or direct wire. They usually have cooktops built-in. Replacing these is like swapping out a refrigerator. You pull the old one out, push the new one in, and hook up the power. The main challenge here is weight and maneuvering through doorways. A typical electric range weighs between 90 and 120 pounds. You’ll likely need a helper to tilt and slide it without scratching your floors or walls.
Built-in Wall Ovens are different beasts. These are installed inside cabinet cutouts, suspended by metal brackets. They don’t have legs; they hang. Removing one involves unscrewing mounting plates, disconnecting wires inside the cabinet, and physically lifting the unit out. Installing the new one requires drilling new holes for the brackets and ensuring the oven is perfectly level. If the cutout dimensions aren’t exact, you might need a carpenter to modify the cabinet frame. This adds complexity and time.
Then there are Slide-in Ranges. These look sleek because they don’t have a back guard that sticks out. They fit snugly against the backsplash. While easier to move than wall ovens, they often require specific side panels to cover the gaps. Make sure your new model includes these panels, or you’ll have ugly exposed sides.
The Electrical Reality Check
This is where most DIY projects go wrong. People assume all ovens plug into the same socket. They don’t. In North America, electric ovens typically run on 240 volts. Older homes might have a 3-prong plug setup, while newer codes (post-1996) require a 4-prong connection for safety grounding.
Before you buy a new oven, check the rating plate on the back of your current unit or look at the circuit breaker panel. You need to know two things: the voltage and the amperage. Most modern ovens require a 40-amp or 50-amp dedicated circuit. If your new oven needs 50 amps but your house only has a 40-amp breaker, you can’t just force it. You’d need an electrician to upgrade the wiring and breaker. That costs money and defeats the purpose of saving on installation.
Also, check the plug type. If your new oven comes with a NEMA 14-50 plug (four prongs) and your wall has a three-prong outlet, you have a problem. You can adapt it temporarily, but it’s not code-compliant long-term. Ideally, you should match the new oven to your existing wiring. Many manufacturers sell models with interchangeable plugs or hardwired options. Choose wisely.
Tools and Prep Work
You don’t need a full workshop to do this, but you do need the right gear. Here’s what to gather before the delivery truck arrives:
- A sturdy dolly: Don’t try to drag a 100-pound oven across tile. You’ll scratch the floor and hurt your back. A furniture dolly with straps is essential.
- Measuring tape: Measure the width, height, and depth of your current oven opening. Also measure the doorway and any hallways you need to navigate. If the new oven is even half an inch wider, it won’t fit.
- Level: Essential for built-in ovens. An unlevel oven cooks unevenly and can cause door seals to fail.
- Basic tool kit: Screwdrivers (Phillips and flathead), adjustable wrenches, and pliers. For built-ins, you may need a drill/driver for mounting brackets.
- Work gloves: Oven edges are sharp. Protect your hands.
Clear the area around the oven. Remove shelves, racks, and anything sitting on top. If you have a gas line nearby (even if unused), shut it off. Turn off the electricity at the main breaker box. Label the breaker so someone else doesn’t flip it back on while you’re working. Safety isn’t optional here.
Step-by-Step Removal Process
Getting the old oven out is straightforward if you follow order. Rushing leads to damage.
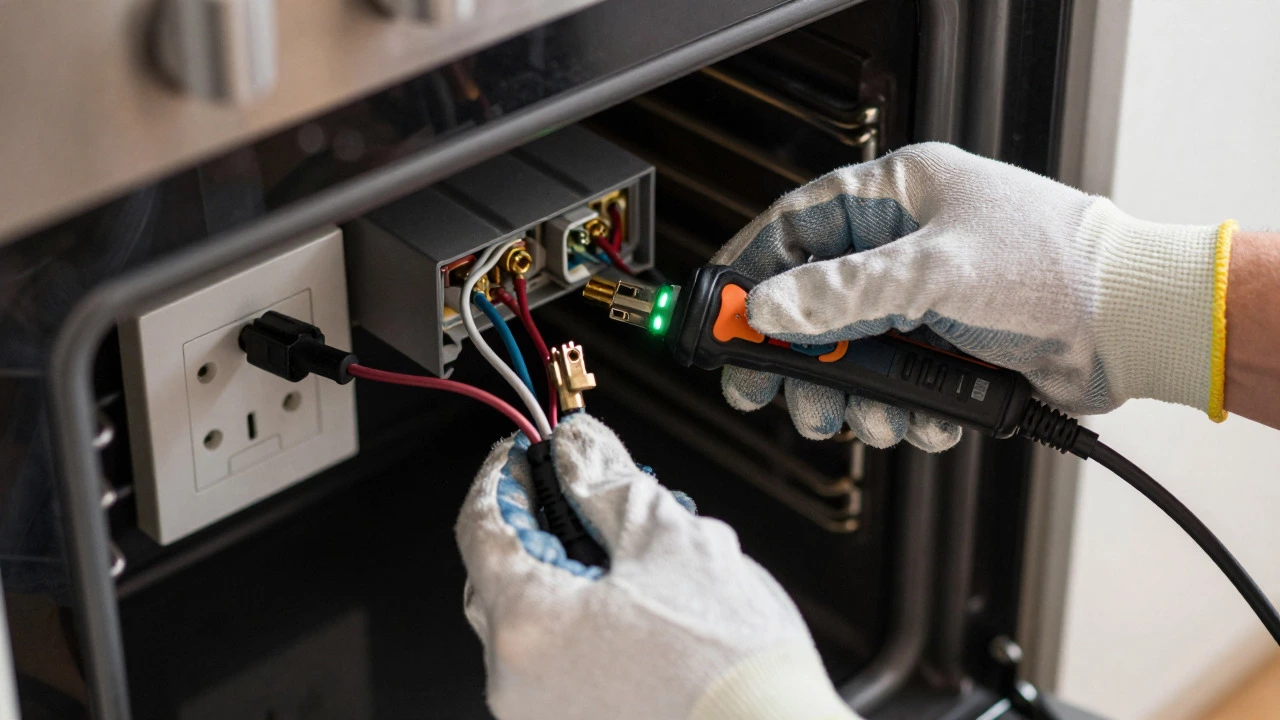
- Disconnect power: Go to your breaker panel and switch off the circuit labeled “Kitchen” or “Range.” Use a non-contact voltage tester to confirm there’s no power at the outlet or junction box behind the oven.
- Unplug or disconnect wires: Pull the oven forward carefully. If it’s plugged in, unplug it. If it’s hardwired, remove the cover plate on the junction box, take a photo of the wiring configuration (for reference later), then loosen the terminal screws and detach the wires. Cap them with wire nuts immediately.
- Remove mounting clips (if applicable): Some freestanding ovens have a clip at the bottom front that locks them to the countertop. Lift the front edge slightly and slide the clip out. Built-in ovens will have screws holding them to the cabinet sides. Unscrew these.
- Lift and move: With a helper, tilt the oven back onto its rear casters (if equipped) or lift it onto the dolly. Secure it with straps. Move it slowly. Watch for low doorframes or tight turns.
Once the old oven is out, clean the floor and the surrounding area. Inspect the electrical outlet or junction box for signs of burning, corrosion, or loose connections. Now is the time to fix those issues before installing the new unit.
Installing the New Oven
Now for the fun part. Bringing the new electric oven into your kitchen. Again, proceed with caution.
- Position the oven: Bring the new oven close to its final spot. Don’t slide it all the way in yet. You need access to the back for connections.
- Connect power: If using a plug, ensure it’s fully seated in the outlet. If hardwiring, reconnect the wires according to the color code (black to black, red to red, white to white, green/bare copper to ground). Tighten terminals securely. Loose connections cause arcing and fires. Double-check your work.
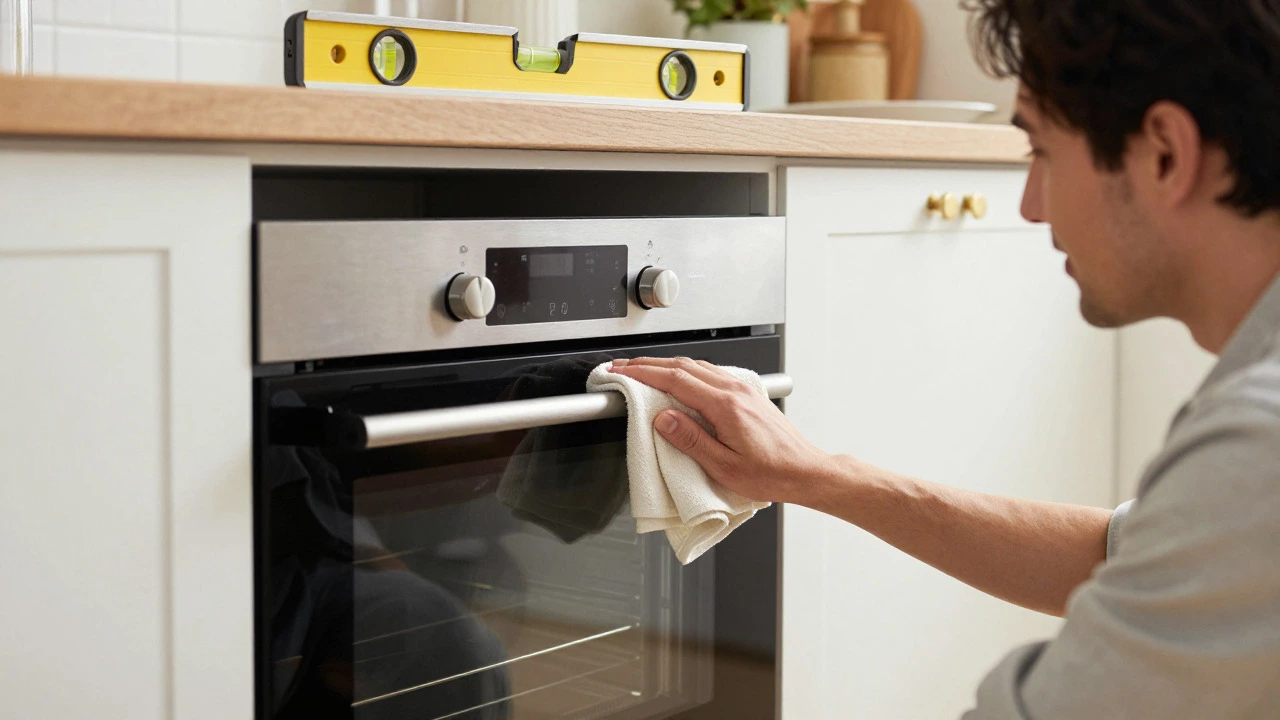
- Slide into place: Gently roll or slide the oven into the cabinet opening. For freestanding ranges, align the feet with the floor. For built-ins, engage the mounting brackets with the cabinet sides. Use the level to check alignment. Adjust the feet or bracket screws until the bubble is centered.
- Secure the unit: Reinstall any mounting clips or screws. Ensure the oven is stable and doesn’t rock.
- Restore power: Go back to the breaker panel and flip the switch back on. Test the oven controls. Turn on the broiler or bake function briefly to verify heating elements activate.
If the oven doesn’t heat up, double-check your wiring connections. If you smell burning or see sparks, turn off the breaker immediately and call an electrician.
When to Call a Professional
While replacing an electric oven is DIY-friendly, some scenarios demand expert help. Don’t ego-trip yourself into danger.
- Different voltage/amperage requirements: If your new oven needs a higher amp circuit than your home provides, an electrician must upgrade the wiring. This involves running new cable from the panel to the kitchen-a job best left to pros.
- Older homes with aluminum wiring: Homes built between 1965 and 1973 often used aluminum wiring, which is prone to oxidation and fire hazards. Connecting a high-draw appliance like an oven to aluminum wire requires special connectors and expertise.
- Complex built-in installations: If you’re replacing a single wall oven with a double oven, or vice versa, the cabinet cutout likely won’t match. You’ll need custom fabrication and possibly structural modifications.
- Gas conversion: If you’re switching from gas to electric, you’ll need to cap the gas line properly and install a new electrical circuit. Two tradespeople involved means higher coordination costs.
In Toronto and much of Canada, homeowners are allowed to do their own electrical work if they obtain a permit and pass inspection. However, many people skip the permit. If you live in an HOA or condo, check your rules first. Unauthorized modifications can void insurance coverage.
Cost Comparison: DIY vs. Pro Installation
| Item | DIY Cost | Professional Cost |
|---|---|---|
| New Electric Oven | $800 - $2,500 | $800 - $2,500 |
| Removal & Disposal | $0 (you haul it) | $50 - $150 |
| Installation Labor | $0 | $150 - $300 |
| Electrical Upgrades (if needed) | $0 - $200 (materials) | $300 - $800+ |
| Total Estimated Cost | $800 - $2,700 | $1,300 - $3,750+ |
As you can see, doing it yourself saves significant money, especially if no electrical upgrades are needed. Even if you pay for disposal services, the labor savings alone justify the effort for most homeowners.
Troubleshooting Common Issues
After installation, you might encounter minor hiccups. Here’s how to handle them.
Oven won’t turn on: Check the breaker. Did you flip it back on correctly? Verify the plug is fully inserted. If hardwired, inspect terminal connections for looseness.
Error codes on display: Modern ovens communicate faults via codes. Consult the manual. Common issues include door latch problems or sensor errors. Sometimes a simple reset (unplugging for 5 minutes) clears temporary glitches.
Uneven cooking: If food burns on one side, your oven isn’t level. Adjust the front feet until the unit sits flat. Run a self-clean cycle to burn off manufacturing residues that can affect airflow.
Door won’t seal: Ensure the oven is fully seated in the cabinet. For built-ins, tighten the mounting brackets evenly. A warped cabinet frame can prevent proper closure.
Frequently Asked Questions
How long does it take to replace an electric oven?
For a freestanding range, expect 1 to 2 hours including removal and installation. Built-in wall ovens can take 3 to 5 hours due to bracket adjustments and leveling. Add extra time if you need to navigate tight spaces or upgrade electrical wiring.
Do I need a permit to replace my electric oven?
In most Canadian municipalities, simply swapping an oven for another of similar specs doesn’t require a permit. However, if you change the amperage, add a new circuit, or modify existing wiring, a permit is required. Check with your local building department to avoid fines.
Can I install a 30-inch oven in a 27-inch space?
No. Standard oven widths are fixed. A 30-inch oven will not fit in a 27-inch cutout. You would need to widen the cabinet opening, which involves carpentry work. Always measure your existing space precisely before purchasing.
What if my new oven has a different plug size?
If the plug doesn’t match your outlet, don’t force it. You can either replace the outlet to match the new plug (recommended) or replace the plug on the oven cord (if you’re comfortable with electrical work). Using adapters is a temporary fix and may violate code.
Should I hire an electrician for oven installation?
Only if you’re unsure about your home’s electrical capacity or if the wiring looks damaged. For standard plug-and-play replacements, a handy homeowner can handle it safely. If you’re upgrading circuits or dealing with aluminum wiring, definitely hire a licensed electrician.