How to Tell If Your Oven Element or Thermostat Is Broken
 Dec, 1 2025
If your oven won’t heat up, or it heats unevenly, or it keeps turning off before it reaches the right temperature, you’re probably wondering: is it the heating element or the thermostat that’s broken? It’s a common problem - especially in older ovens - and fixing it yourself can save you hundreds of dollars. You don’t need to be an electrician. You just need to know what to look for and how to check it safely.
Start by ruling out the obvious
Before you start taking your oven apart, make sure it’s not something simple. Did you accidentally turn off the circuit breaker? Is the oven set to timer mode instead of bake? Did you leave the oven door open during preheat? These sound silly, but they happen more than you think. Check your owner’s manual - most ovens have a diagnostic mode that shows error codes on the display. If you see an F1, F3, or E0 code, look it up. Many modern ovens will tell you exactly what’s wrong.If there’s no display or no error code, move on to the next step.
Check the bake element first
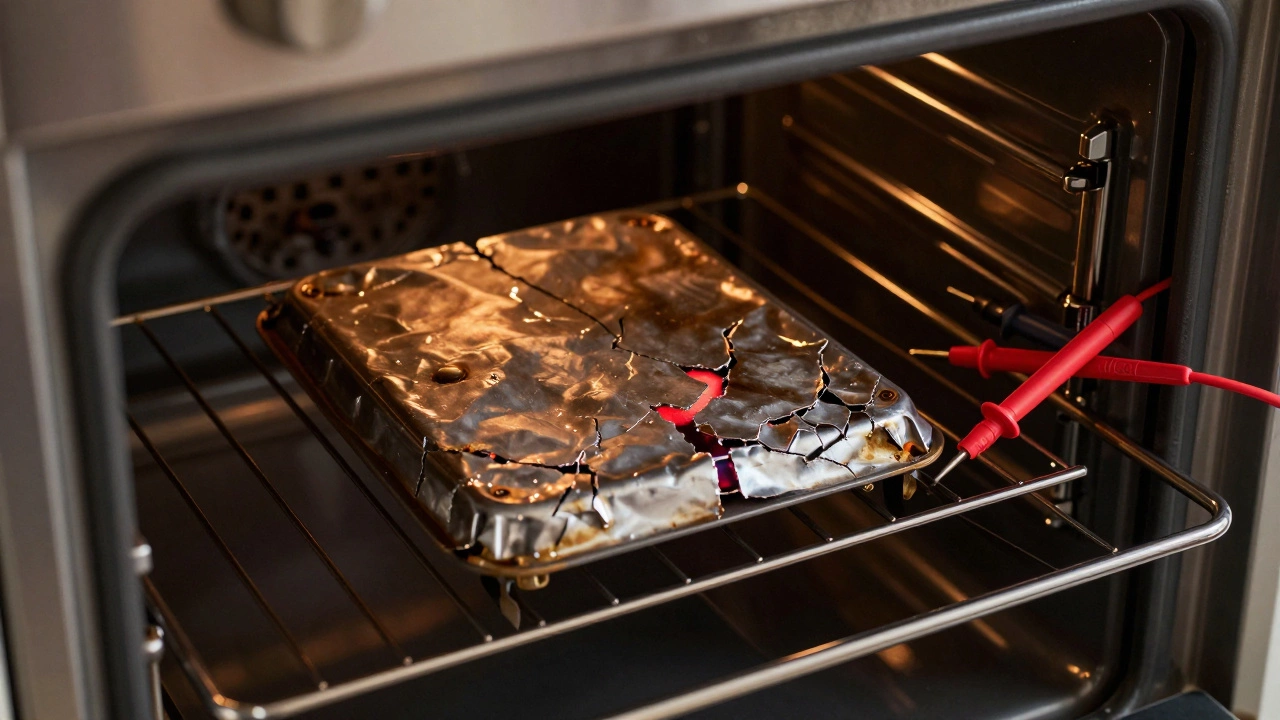
The bake element is the long, coiled metal rod at the bottom of your oven. It’s the one that glows red when the oven is heating. If it’s broken, your oven won’t reach temperature - or it might only heat unevenly.Here’s how to check it:
- Turn off the power at the circuit breaker. Never work on an oven while it’s plugged in.
- Open the oven door and remove the racks.
- Look closely at the element. Do you see any cracks, blisters, or spots where the metal has separated? Even a tiny gap means it’s done.
- If it looks fine, use a multimeter to test for continuity. Set it to ohms (Ω). Touch one probe to each terminal on the element. You should get a reading between 20 and 120 ohms. If it shows infinite resistance (OL or 1), the element is dead.
Most bake elements last 5 to 10 years. If your oven is older than that and the element looks worn, replace it. They’re cheap - usually under $50 - and easy to install. Just unplug the old one, screw in the new one, and reconnect the wires.
What if the broil element works but the bake doesn’t?
If the top element glows when you use the broil setting but the bottom one stays dark during bake mode, that’s a strong sign the bake element is faulty. But if both elements stay cold, the problem might not be the element at all.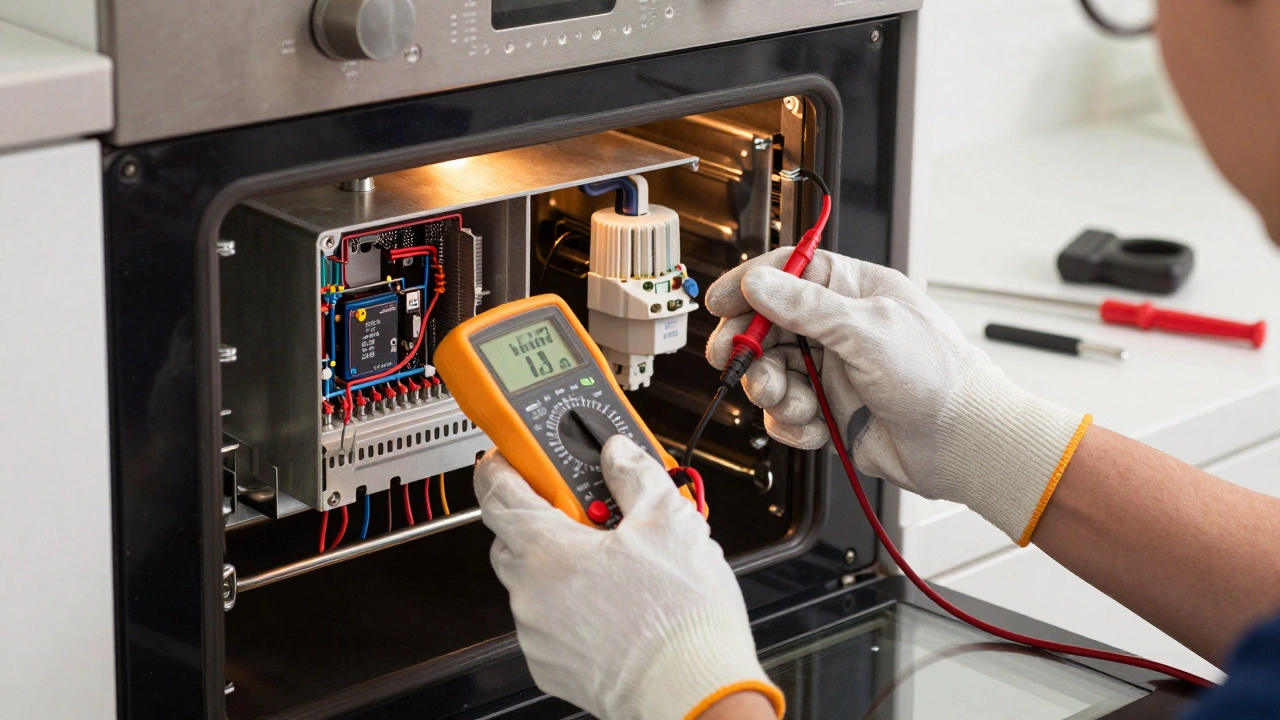
Test the thermostat next
The thermostat is the part that tells your oven when to turn the heat on and off. If it’s broken, your oven might not reach the right temperature, or it might overheat and shut off. A faulty thermostat is harder to spot because it doesn’t always show visible damage.Here’s how to test it:
- Turn off the power again. Safety first.
- Remove the back panel of the oven. You’ll usually find the thermostat behind the temperature control knob on the front panel.
- Locate the thermostat - it’s a small metal box with wires coming out of it. The capillary tube (a thin metal tube) runs from the thermostat to a sensor inside the oven cavity.
- Disconnect the wires carefully and label them so you know where they go.
- Use your multimeter again. Set it to ohms. Touch the probes to the thermostat’s terminals. At room temperature, you should get a reading between 1,000 and 2,500 ohms. If it reads OL or zero, the thermostat is bad.
Some thermostats are mechanical, others are electronic. If yours is electronic, it might need a voltage test instead. But most home ovens use the older mechanical type - and those are the ones that fail most often.
Signs your thermostat is failing
You don’t always need a multimeter to suspect a bad thermostat. Watch for these patterns:- Your oven takes twice as long to preheat as it used to.
- Food comes out undercooked even when you follow the recipe exactly.
- The oven shuts off before reaching the set temperature.
- The oven runs too hot - cookies burn on the bottom, cakes collapse.
- You notice the oven cycling on and off too frequently - like it’s stuttering.
These aren’t just random issues. They’re classic signs the thermostat can’t read the temperature correctly. It’s either stuck open (always on) or stuck closed (never on).
Can you test both at the same time?
No. You have to test them one at a time. The element is the easiest to check, so start there. If it’s fine, then move to the thermostat. Replacing both at once is a waste of money unless you’re certain both are bad.Most people replace the element first. It’s cheaper, faster, and more likely to be the culprit. If the oven still doesn’t work after replacing the element, then the thermostat is your next target.
What about the temperature sensor?
Many modern ovens have a separate temperature sensor - a thin metal probe that sticks into the oven cavity. It’s different from the thermostat. The sensor sends temperature data to the control board, which then tells the thermostat when to turn on.If your oven has a sensor, test it too. It’s usually located on the back wall of the oven. Use your multimeter to check resistance. At 70°F (21°C), it should read around 1,000 to 1,100 ohms. If it’s way off, replace it. Sensors cost about $30 and are easy to swap.
When to call a pro
You can fix 9 out of 10 oven heating problems yourself. But if you’re uncomfortable working with electricity, or if you’ve replaced the element, thermostat, and sensor - and it still doesn’t work - the issue might be with the control board. That’s not a DIY fix. Control boards are expensive ($150-$300), hard to diagnose, and require precise programming in some models.Also, if your oven is over 15 years old, think about replacement. Newer models are more energy-efficient, have better temperature control, and come with safety features like automatic shut-off. The cost of repairs might not be worth it.
Prevent future problems
To make your oven last longer:- Clean spills quickly. Built-up grease can overheat and damage elements.
- Don’t use harsh cleaners on the element. They can corrode the metal.
- Check the door seal. A worn gasket lets heat escape, making the thermostat work harder.
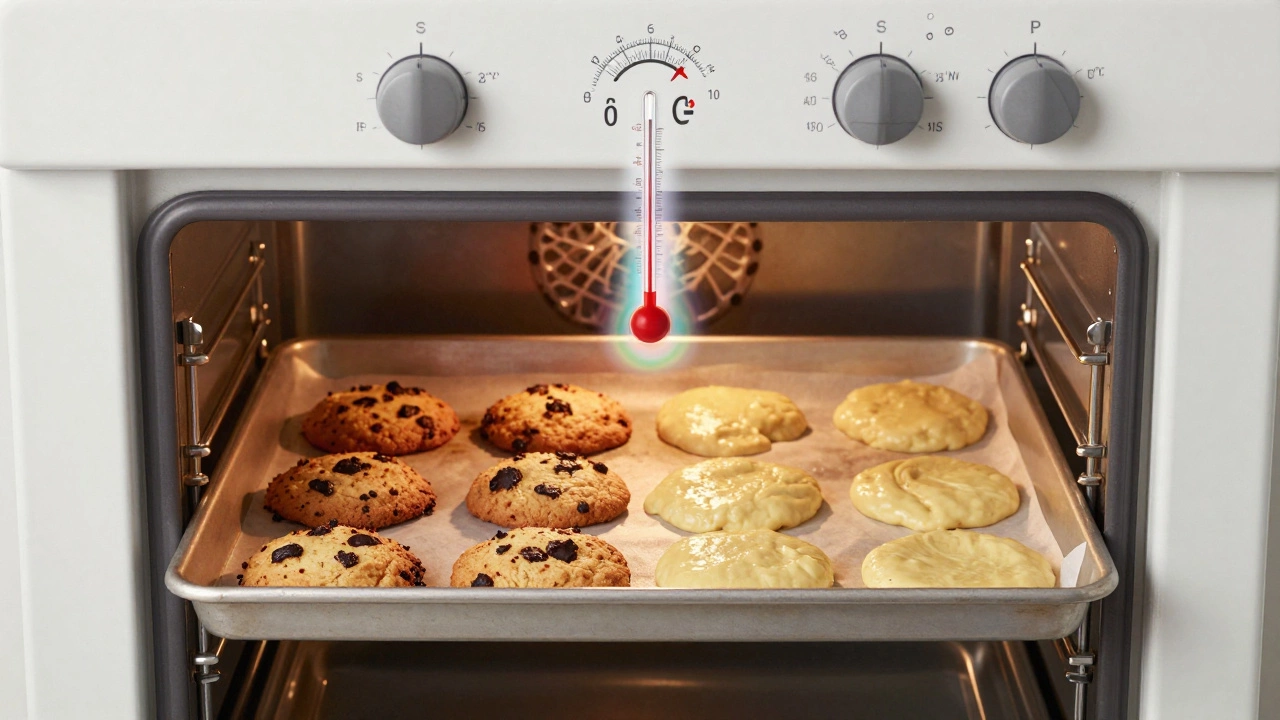
- Calibrate your oven every year. Place an oven thermometer inside and compare it to the display. If it’s off by more than 25°F, adjust the calibration setting or replace the thermostat.
Most ovens fail because they’re neglected. A little maintenance goes a long way.
How do I know if my oven element is blown?
Look for visible damage like cracks, bulges, or broken sections. If it doesn’t glow red when the oven is on, that’s another sign. Test it with a multimeter - if it shows infinite resistance (OL), the element is dead and needs replacing.
Can a faulty thermostat cause uneven baking?
Yes. If the thermostat can’t accurately sense the oven’s temperature, it might turn the heat on and off at the wrong times. This leads to hot spots or undercooked areas. You might notice one side of your cake is burnt while the other is raw.
Is it cheaper to repair or replace an old oven?
If your oven is over 10 years old and needs more than one part replaced, replacement is usually cheaper. A new basic oven costs $400-$700. Replacing a thermostat and element could cost $150-$250 in parts and labor - not counting your time. Energy savings from a new model also add up over time.
Why does my oven turn off before it reaches the set temperature?
This is a classic thermostat failure. The thermostat thinks the oven is hotter than it really is, so it cuts power early. It could also be a faulty temperature sensor or a damaged control board. Test the thermostat first - it’s the most common cause.
Do I need to turn off the power before testing oven parts?
Absolutely. Always shut off the circuit breaker before touching any wires or components. Even when the oven is off, the internal wiring can still carry live current. Safety isn’t optional - it’s necessary.