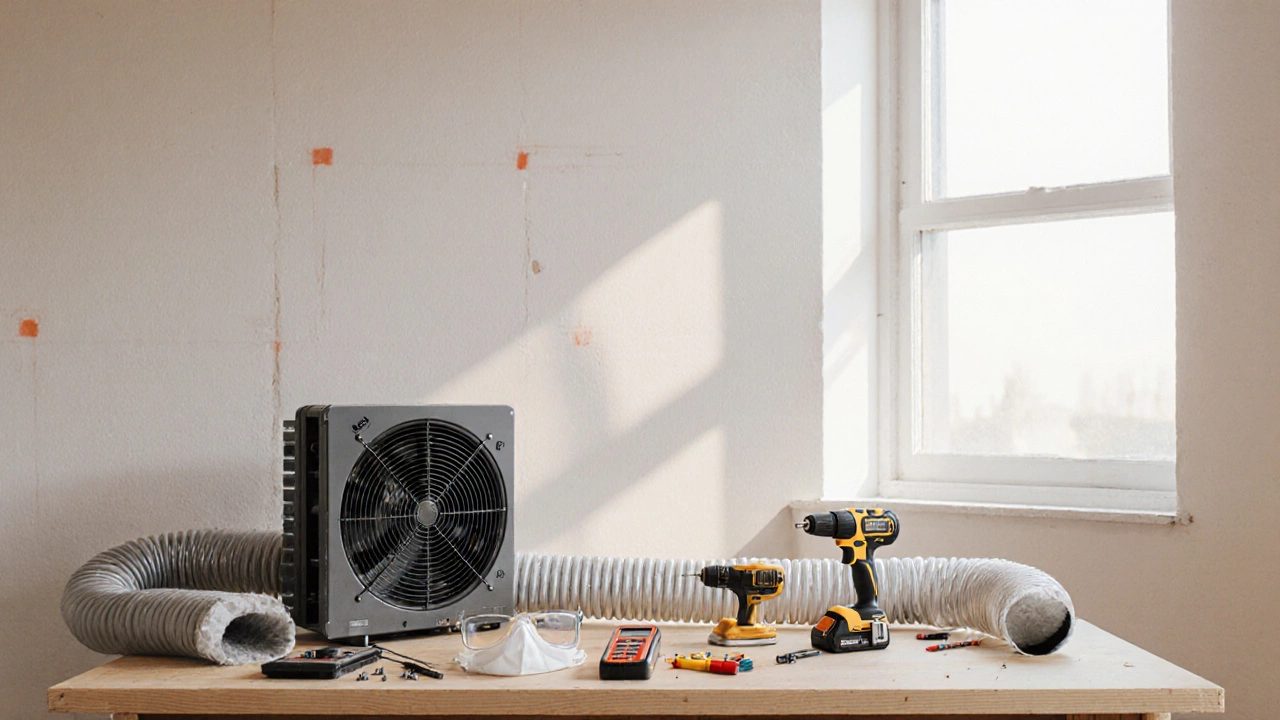
DIY Fan Install: Tips, Tools & Common Mistakes
DIY fan install, the process of fitting or replacing a home ventilation fan yourself, following safety guidelines and proper tools self‑install fan. It’s a task that many homeowners tackle to avoid pricey service calls. The core idea is simple: you remove the old unit, hook up the wiring, and secure the new fan. Yet it touches several related entities. An extractor fan, a device that pulls stale air out of a bathroom, kitchen or utility space often shares the same housing as a bathroom fan, a compact unit designed for moisture‑laden bathroom environments. A kitchen extractor fan, a larger, more powerful fan that handles steam and cooking odors may require a heavier duty motor, which brings the fan motor, the rotating component that drives airflow in any fan system into focus. Understanding how these pieces interconnect forms the basis of a safe, effective DIY fan install.
First, identify the fan type you’re dealing with. An extractor fan for a small powder room will have different airflow requirements (measured in cubic feet per minute) than a kitchen hood handling high‑heat cooking. That distinction influences the size of the motor and the ductwork diameter. Semantic triple: DIY fan install encompasses extractor fan replacement. If the fan is part of a vented system, you’ll also need to check the duct path for blockages – a clean duct ensures the new motor can achieve its rated flow. Ignoring duct condition often leads to weak suction later, which is why many guides stress cleaning before installation.
Why Electrical Safety Is Non‑Negotiable
Every fan installation involves electricity, so you must treat the wiring like any other home wiring job. Turn off the circuit breaker, verify voltage is absent with a tester, and use insulated tools. This requirement creates a clear semantic link: DIY fan install requires electrical safety knowledge. Knowing the difference between a flexible cord set and hard‑wired connections saves you from costly re‑work. For a hard‑wired bathroom fan, you’ll typically connect black (live), white (neutral) and green or bare (ground) wires to the fan’s terminal block. Mistaking live for neutral can damage the motor and create a fire hazard.
Once the power is safely isolated, remove the old fan. Most units are secured with a few screws and a mounting bracket. Keep the bracket if it’s in good condition; re‑using it reduces the number of new parts you need. While you’re at it, inspect the mounting surface for signs of water damage or rot – any compromised area should be repaired before the new fan goes in. This step also gives a chance to upgrade the mounting bracket if you plan to install a heavier kitchen extractor fan, which often demands a sturdier support.
Next comes the actual mounting of the new fan. Align the fan’s outlet with the existing duct opening. If the duct size doesn’t match, use a reducer or enlarger collar to seal the gap – a tight seal prevents air leaks and maintains efficiency. Tightening the fan housing onto the duct with a screwdriver ensures a rigid connection. After the mechanical fit, reconnect the wiring, matching each wire to its proper terminal. Many fans include a built‑in safety switch that cuts power when the housing is removed; test that feature before you seal everything up.
With the fan in place, verify its operation before you finish the wall or ceiling trim. Turn the breaker back on and run the fan at low, medium, and high speeds. Listen for unusual noises – rattling could mean a loose blade or an incorrectly seated motor. Check airflow by holding a piece of paper near the vent; it should be drawn in firmly at all speeds. If the fan feels weak, revisit the duct for obstructions or re‑seal any gaps that may have formed during installation.
Even after everything checks out, it’s wise to set up a maintenance routine. A quick monthly cleaning of the fan’s grille and a semi‑annual inspection of the motor and duct will keep performance steady. For bathroom fans, the grille often collects soap scum, while kitchen extractors can accumulate grease that clogs the motor. Regular attention reduces the chance you’ll need a professional repair down the road.
Of course, not every situation is a DIY win. If the wiring in your home is outdated, if the fan requires a dedicated circuit, or if you encounter unexpected structural issues, calling a qualified electrician or HVAC specialist is the safest route. Knowing when to stop is as important as knowing how to start. Below you’ll find a curated collection of articles that dive deeper into specific fan‑related topics – from motor replacement guides to troubleshooting weak suction, and advice on who to call when the job gets too complex.
DIY Extractor Fan Installation: Step‑by‑Step Guide
Learn how to safely install an extractor fan yourself with step‑by‑step instructions, tool lists, wiring tips, code checks, and common pitfalls for a DIY home ventilation upgrade.