DIY Oven Installation: Step‑by‑Step Guide for Homeowners
Thinking about swapping out your old oven yourself? You can do it, but only if you follow a clear plan and respect the safety rules. This guide walks you through the whole process – from measuring the space to connecting the power safely – so you avoid costly mistakes and finish the job in a day.
1. Check the Basics Before You Start
First, make sure the new oven fits the cut‑out. Measure the width, height, and depth of the existing cavity and compare it to the specs on the new model. Leave at least a 2‑cm gap on the sides for airflow. Next, verify the power rating. Most electric ovens need a 240‑V, 30‑amp circuit. If your current outlet is 15‑amp, you’ll have to upgrade the wiring – that’s where an electrician steps in.
Grab the user manual and keep it handy. The wiring diagram in the manual shows the colour codes for the live, neutral, and earth wires. If the colours don’t match UK standards (brown = live, blue = neutral, green/yellow = earth), stop and call a pro.
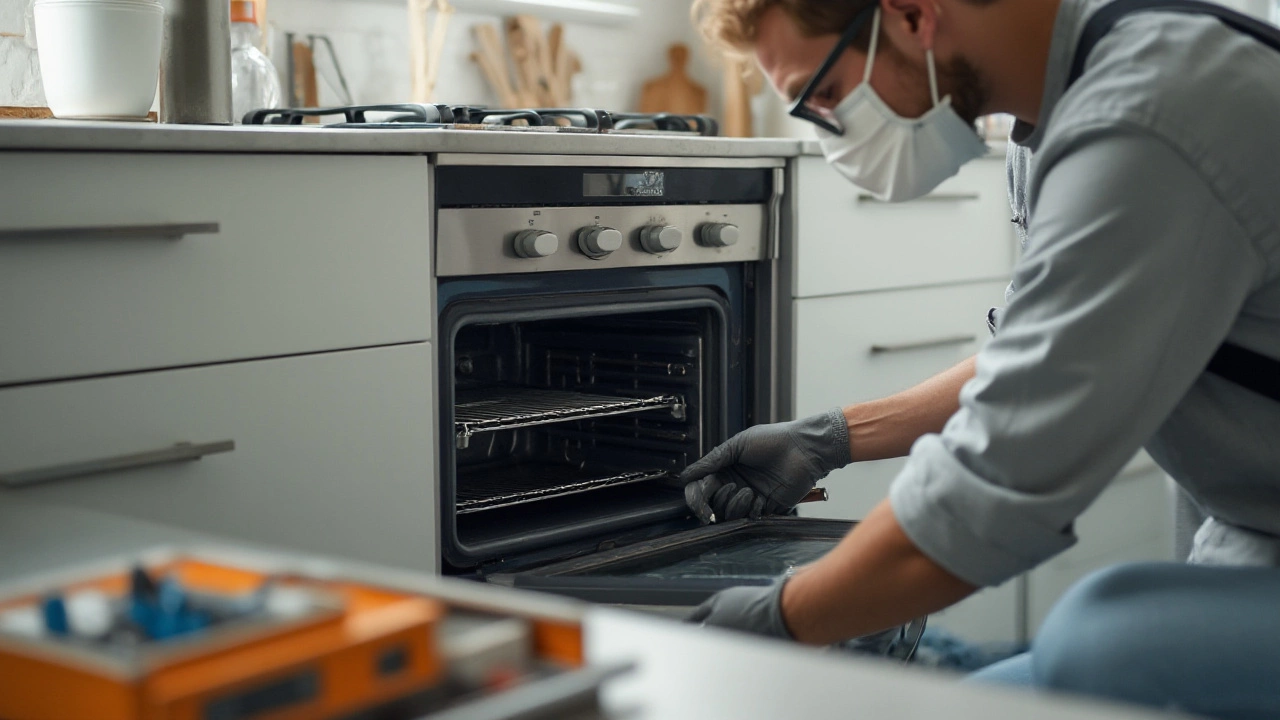
2. Remove the Old Oven Safely
Turn off the breaker at the consumer unit. Never rely on the wall switch alone – a hidden fuse could still be live. Use a voltage tester on the outlet to confirm there’s no power. Once you’re sure, remove the screws that hold the old oven in place, pull it out gently, and disconnect the cable. If the cable is hard‑wired, you’ll need a screwdriver to undo the terminal block. Label each wire before you loosen it – it saves confusion later.
Clean the cavity of any debris or old sealant. A clean surface helps the new oven sit level and prevents gaps that could cause heat loss.
3. Install the New Oven
Slide the new oven into the cavity, checking that it’s level with a spirit level. Adjust the legs if needed – most ovens have threaded feet you can turn up or down. Secure the oven with the supplied brackets and screws.
Now the wiring. Strip about 10 mm off the ends of each wire, twist the strands, and connect them to the terminal block exactly as shown in the manual. Tighten the screws firmly but don’t over‑tighten, which could damage the wire. Double‑check that the earth wire is attached to the earth terminal – this is the most important safety link.
When all connections are tight, push the cable back into the wall box, replace the cover plate, and restore the breaker.
4. Test and Finish Up
Turn the power back on and set the oven to a low temperature for a quick test. Listen for any humming or smell of burning – if anything feels off, switch it off and check the connections again. Once the oven runs cleanly, wipe down the exterior and replace any trim pieces removed earlier.
Finally, register the appliance with the manufacturer and note the warranty dates. Keeping paperwork helps if a future repair is needed.
DIY oven installation can save you money and give you a sense of achievement, as long as you respect the electrical safety rules. If you ever doubt the wiring, pause and call an electrician – it’s cheaper than a disaster later.
Ready to get cooking? Grab your tools, follow these steps, and you’ll have a brand‑new oven humming in no time.
How to Safely Replace Your Electric Oven at Home
Replacing an electric oven yourself can be a feasible task with the right tools and precautions. This article explores the steps needed to safely and effectively carry out the replacement, from disconnecting the old unit to installing the new one. It highlights essential safety tips to consider and provides practical advice for DIY enthusiasts. Discover whether this project suits your skill level and how to ensure a successful installation.